

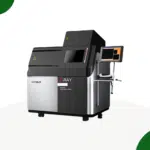
X-ray inspection machine Xmark6
Rated 5.00 out of 5 based on 1 customer rating
(1 customer review)
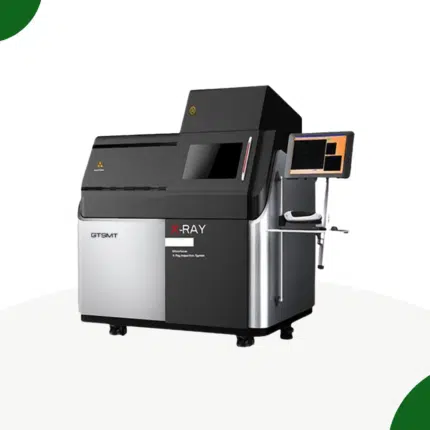
X-ray inspection machine Xmark6
- X-ray tube and detector can move along the Z direction, Speed of the table moving along the X-Y direction can be adjusted.
- High-definition digital flat panel detector.
- Max Inclined Angle is 65°, and samples can be observed with a unique perspective
- Long-life X-ray tube, maintenance-free for life.
- Faults less than 2.5μm can be detected. High detection repeat accuracy.
Powerful - CNC Measuring Function can test automatically, testing program can be edited.
Category: xray inspection machine
Description
X-ray inspection machine Xmark6
Optimize your manufacturing process with our X-Ray Inspection Machine Xmark6. Featuring high-resolution imaging and advanced defect detection, it ensures accurate inspection of PCBs, solder joints, and internal components. Ideal for electronics manufacturers, this machine provides non-destructive testing, and real-time analysis, and enhances product quality. Improve your production efficiency and minimize errors with our reliable X-ray inspection machine solution.
|
X-Ray inspection machine Hardware technical parameters |
||||
|
H A R D W A R E |
X-RAY tube |
Tube type |
Sealed microfocus X-ray tube |
|
| Tube voltage |
40-90kV |
|||
| Tube current |
10-200uA |
|||
| Focal spot size |
5-15μm |
|||
| Cooling method |
Convection cooling |
|||
|
Detector |
Detector type |
HD digital flat panel detector (FPD) |
||
| Imaging area |
130mm*130mm |
|||
| Pixel matrix |
1536*1536 pixels |
|||
| Inclined Angle |
0-60° |
|||
|
Inspection speed and accuracy |
Repeated test accuracy |
3μm |
||
| Software inspection speed |
3.0s/point (Excluding loading and unloading time) |
|||
|
Table |
Standard size |
540mm*440mm |
||
| Effective inspection area |
500mm×410mm |
|||
| Load capacity |
≤5Kg |
|||
|
CNC programming |
Test parameters for different products can be stored in categories and called at any time. You can set the detection route or sequence of one or more products, and the program automatically completes the detection and stores the photos. | |||
|
Operating platform |
Mouse, keyboard, 2 operating modes | |||
|
Shell |
Inner lead plate | 5 mm thick lead plate (isolate radiation) | ||
| Dimensions | 1360mm(L) * 1240mm(W) * 1700mm(H) | |||
| Weight | 1250Kg | |||
|
Other parameters |
Computer | 24 inches Widescreen LCD/I3 CPU/2G Memory/200G hard disk | ||
| Power supply | AC220V 10A | |||
| Temperature and humidity | 22±3℃ 50%RH±10%RH | |||
| Total power | 1700W | |||
|
Safety |
Radiation safety standard | Adopt steel-lead-steel protection structure. Any position 20mm from the shell, radiation≤1μSV/H, in line with international standards | ||
| Safety interlock function | Two high-sensitivity limit switches are set in the door opening position for equipment maintenance. Once the door is opened, the X-ray tube will automatically power off immediately. | |||
| Electromagnetic switch protection | The observation window has an electromagnetic switch, and the observation window cannot be opened when the X-ray tube is in working state. | |||
| Observation window | With an observation window, the sample can be observed directly from the window while the machine is running. | |||
| Emergency stop | The emergency stop is set in the prominent position of the operation console and the equipment body, can be pressed to quickly cut off the power supply system. | |||
| X-ray tube automatic protection | Five minutes after the machine has no operation, the X-ray tube will automatically power off and enter the protection state. | |||
| Automatic machine protection | Once any door or window of the machine is turned on, the machine immediately enters the shutdown protection state, and any operation cannot be performed. | |||
Key Features:
- High-Resolution Imaging: Advanced X-ray technology provides clear and detailed images for accurate analysis.
- 3D Inspection Capability: Offers real-time 3D imaging for an in-depth view of internal structures and defects.
- Automated Defect Detection: Integrated software algorithms for identifying solder joint issues, component misalignment, and voids.
- Wide Inspection Area: Accommodates various PCB sizes and component densities.
- Adjustable Power Settings: Customizable X-ray power levels for inspecting different materials and thicknesses.
- User-Friendly Software Interface: Intuitive control panel for easy operation and data analysis.
- Safety Compliance: Built with robust shielding and safety measures to protect operators from radiation exposure.
Applications of x-ray inspection machine:
- SMT assembly quality control with x-ray inspection machine
- Inspection of solder joints, BGA (Ball Grid Array), and QFN (Quad Flat No-Lead) components
- Evaluation of multilayer PCBs and electronic components
- Non-destructive testing in industries like aerospace, automotive, and medical devices
Benefits:
- Enhances product quality by identifying defects at an early stage
- Reduces rework and manufacturing costs through accurate defect detection
- Ensures compliance with stringent industry standards
Reviews (1)
1 review for X-ray inspection machine Xmark6
Add a review Cancel reply
Shipping & Delivery

 Pick and Place
 Rework Station
 Solder Paste Printers
 Reflow Ovens
 Reel Storage System
 AOI & SPI INSPECTION
 Soldering Machines
 Insertion Machine
 X-ray inspection
 PCB Handeling
 Depaneling Machine


asad.kamran4321@gmail.com –
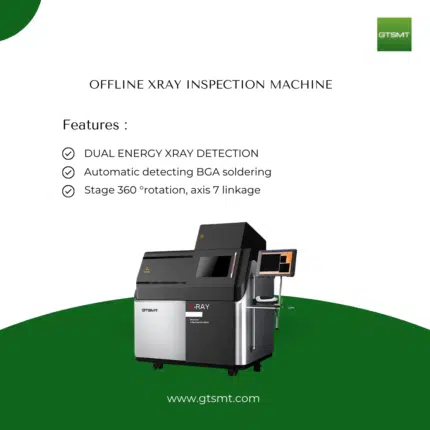
offline x-ray inspection machine for pcb assembly.